KEYPrime Intro
How to gain access to companies when ‘No Licence is available’?
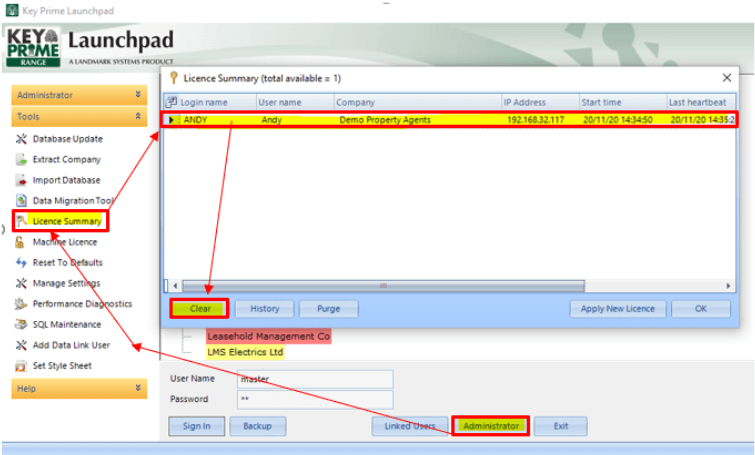
Go to ‘Tools’ > ‘Licence Summary’
Select ‘User’ & clear; close that dialogue box then try to sign in again.
I am getting an error message ‘Landmark Updater Service is not running, Launchpad needs to run as Administrator to start’.
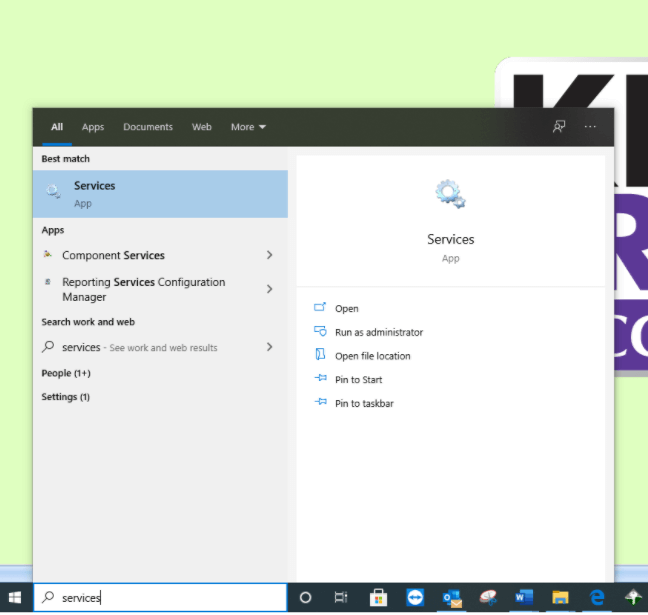
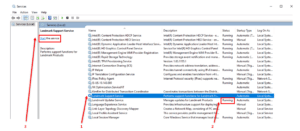
Look for: ‘Landmark Support Services’ [1 on screenshot below] and ‘Landmark Updater Services’
If the ‘Status’ [2] is blank on either of them, you will need to start them by right clicking on the line, then clicking on ‘Start’ [3]
If the statuses say ‘Started’ or ‘Running’, right click and select ‘Restart
Then try logging in again.
Is there a Quick Start video guide for KEYPrime Intro?
Can I import my nominal codes to KEYPrime Intro?
The PrimeIntroNominalCodeList template can be found under ‘C:\Users\username\Documents\KEYPrime\Document Templates’ or downloaded from our resources page and can be edited to the required nominal structure before importing.
Can I setup a Customer as a Supplier?

How do I send a backup to my accountant?
How do I backup a single company?
To backup a single company;
Select company on Launchpad
Go to Administrator > Tools > Extract Company
Backup will take longer than normal as it will backup the full database then remove the records relating to all other companies.
IMPORTANT NOTE: A single company backup CANNOT be restored to the database.
Do you have guidelines on VAT Code recommendations?
How do I upgrade to SQL 2019?
This message will be displayed from the Launchpad advising that the upgrade is available.
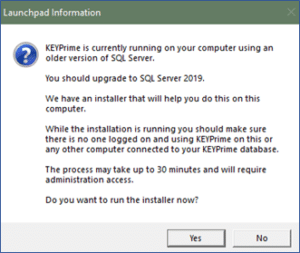
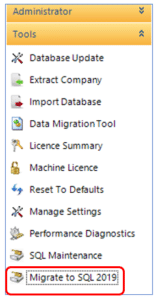
This can be also started manually using the Tools menu item “Migrate to SQL 2019”.
Should you click on this when you already have SQL2019 installed, you will just get a message telling you that you do not need to proceed.
The installation can take up to 30 minutes. During the process there should be no one using the KEYPrime database either locally or on another computer connected to the local databases.
When the process starts it will request administration access to your computer and open the Landmark SQL Server 2019 upgrade utility:
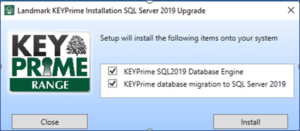
The upgrade has two steps:
KEYPrime SQL 2019 Database Engine – This will install a SQL Server 2019 express called LMSQL 2019.
KEYPrime database migration to SQL Server 2019 – This transfers the existing SQL 2012 databases to SQL 2019.
Select the Install button. The SQL Server 2019 installer will download the setup files to your computer. Once the download is complete the installer will run through setting up SQL Server 2019 on the computer.
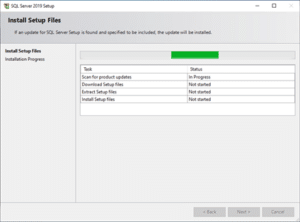
When the installation is complete then the KEYPrime Migration will start:
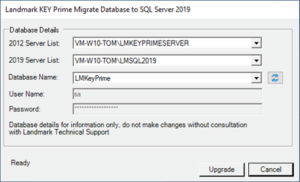
This will show the source and destination for the migration of each database.
If the setup is a standard Landmark KEYPrime this should show the name:
“<ComputerName>\LMKEYPRIMESERVER” for the 2012 SQL Server and
“<ComputerName>\LMSQL 2019” for the 2019 SQL server.
The database field should have the name of a KEYPrime database stored in the SQL 2012 instance. Click Upgrade to upgrade the database to SQL 2019.
PLEASE NOTE that once the database has been upgraded to SQL 2019 you will not be able to use it on SQL 2012. If you need to share or send your database to anyone external such as your accountant, you should avoid migrating your database until they have been able to install SQL 2019 on their own copy of KEYPrime.
After a database has been migrated the Database field will automatically select another database from the list and clicking Upgrade will migrate the next database. This process should be repeated until all the databases to be upgraded have been done. The database field has a drop down to be able to select a specific database if necessary.
When all the required databases have been upgraded then click on the Exit button. This will return you to the main upgrade screen which can be closed. The upgraded databases should now all show LMSQL 2019 within Launchpad. You can check this has worked by adding the Instance column to the grid in Launchpad using the field chooser:

 DATA ENTRY
HMRC has failed to process your VAT submission?
Continue
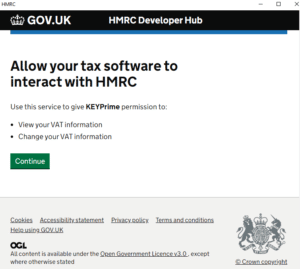
Make sure you have the correct MTD Government Gateway credentials to hand. The process will culminate upon clicking
Give permission
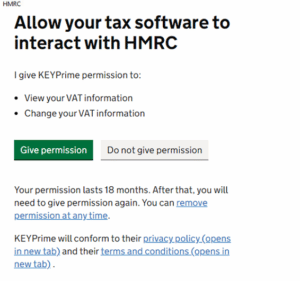
Your return will be submitted successfully.
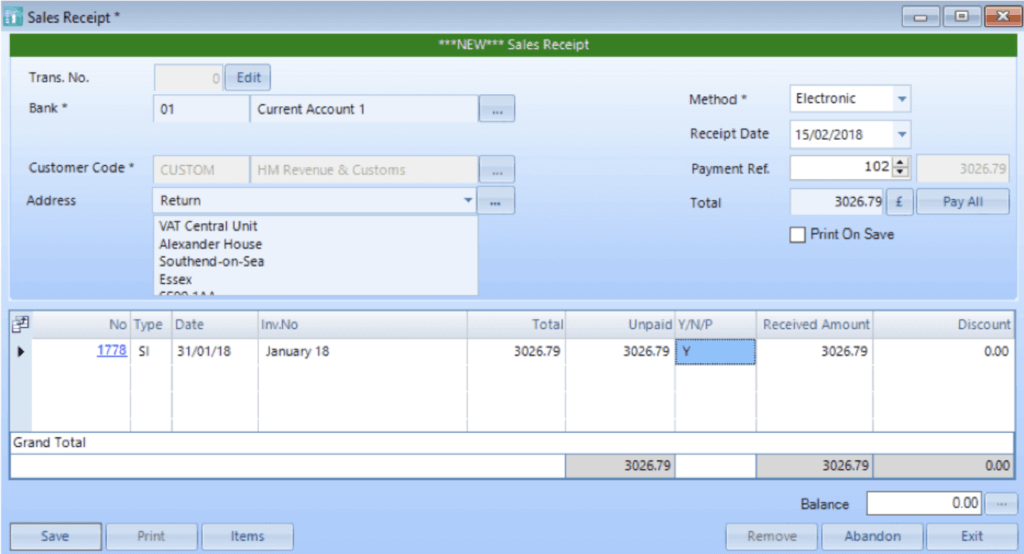
How do I enter my VAT receipt/payment from HMRC?
For Payments; follow the same process as above but select ‘Purchase Payment’ instead of Sales Receipt.
When running my VAT return why is KEYPrime producing ‘VAT Return 1 of 2. See supplementary return’?
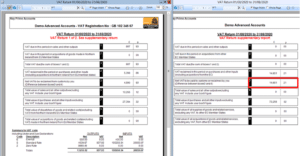
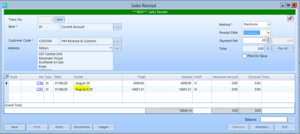
VAT Return supplementary report 2 of 2 are the under/over amounts that need to be submitted by you to HMRC using their VAT652 form. In the example above the figure of 14,651.21 can be reclaimed and allocated against the second invoice created in KEYPrime.
See below link to get to the VAT652 form.
https://www.gov.uk/vat-corrections/report-error
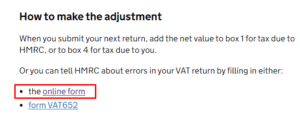
Scroll down to the online form and follow the steps to submit manually
How do I enter an asset purchased on a Hire Purchase Agreement (includes part exchange)?
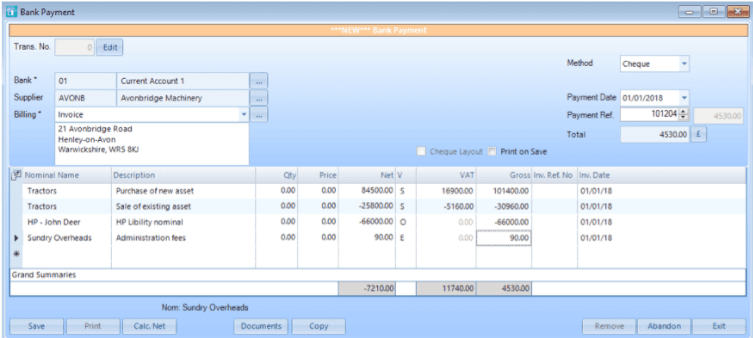
The Bank payment should be posted as below with the first item line going to your assets nominal which should be in the Current Assets group.
The second item line will also go to the same nominal but will be as a negative value as this is the value of the asset you have part exchanged. If there is no part exchange, you can ignore this line.
The third line should be posted against a new nominal for the amount financed, this will be within the Liabilities group and again will be entered as a negative value.
Finally, if relevant any charges included on your initial payment should be posted against your HP interest and charges nominal.
Why can I not select a VAT code other than O (Outside Scope)?
How do I enter a bounced Cheque?
How do I enter a new loan I have taken out from the bank?
When paying back your loan, post a bank payment with the capital amount being posted to the loan nominal and the interest posted to your interest charges in the overheads group.
An alternative method would be to setup the loan account as a bank account and enter bank transfers from one account to the other, however, we do not generally recommend this method as you cannot see the cash movement on your cashflow reports.
How do I enter my fuel scale charge?
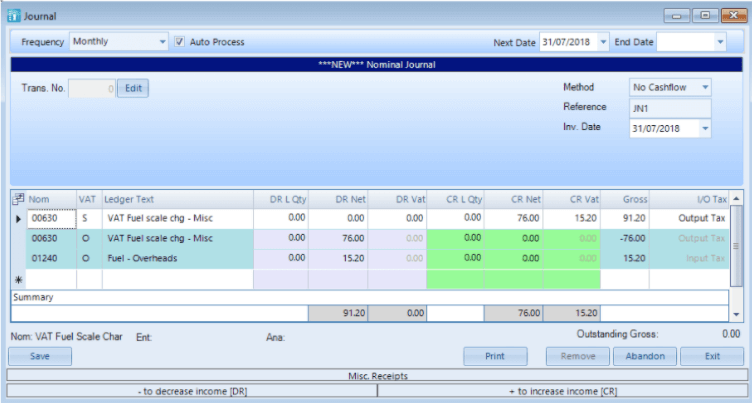
First line goes to the new income nominal and is standard rated VAT set as Output Tax. The amounts should be calculated using HMRC’s VAT rate tables. Enter as CR Net and CR Vat.
Second line is also to the income nominal but O VAT and just the net value from your first line. Enter as DR Net.
Third line is your Fuel cost nominal and O VAT and just the VAT value from your first line. Enter as DR Net.
How do I add/attach a document to my invoice?
How do I add a Sales Invoice / Sales Receipt?
Can I import my bank statements into KEYPrime?
How do I use AutoEntry with KEYPrime?
How do I use Dext with KEYPrime?
How do I set up a Direct Feed for my bank accounts in KEYPrime?
Access consent- Please note every 90-120 days each bank’s Direct feed will require reauthorisation. The specified date and time the permission will expire is not visible inside KEYPrime.
Which UK banks are available for Direct Feed in KEYPrime?
| Bank | Account Type |
| Bank of Scotland | Current Account |
| Barclays | Current Account, Savings Account |
| Chelsea Building Society | Savings Account |
| Danske | Current Account, Savings Account |
| First Direct | Current Account |
| Halifax | Current Account, Savings Account |
| HSBC | Current Account, Savings Account |
| Lloyds | Current Account, Savings Account |
| Monzo | Current Account, Savings Account |
| Nationwide | Current Account |
| NatWest | Current Account, Savings Account |
| Revolut | Current Account |
| Royal Bank of Scotland | Current Account |
| Sainsbury’s Bank | Current Account |
| Santander | Current Account |
| Starling | Current Account |
| Tesco Bank | Savings Account |
| Tide | Current Account |
| TSB | Current Account, Savings Account |
| Ulster Bank Northern Ireland | Current Account, Savings Account |
| Virgin Money Standalone | Current Account |
| Wise | Current Account, Savings Account |
| Yorkshire Building Society | Savings Account |
Please note we currently do not connect to credit card accounts as these work differently to standard bank accounts
 YEAR END AND OPENING BALANCES
How do I run my year end in KEYPrime Intro?
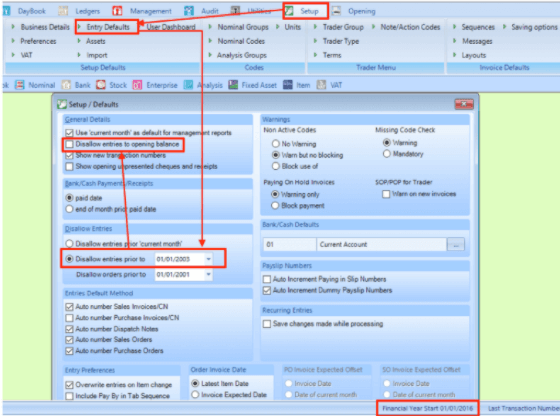
How do I allow edits to my opening balances?
Select ‘Disallow entries to opening balance’ and enter a date prior to your current Financial Year which shows at the bottom of your screen.
Now ensure the ‘Disallow entries to opening balances’ is unticked. The Opening menu will now show on the top menu bar.
 PRINTING & STATIONERY
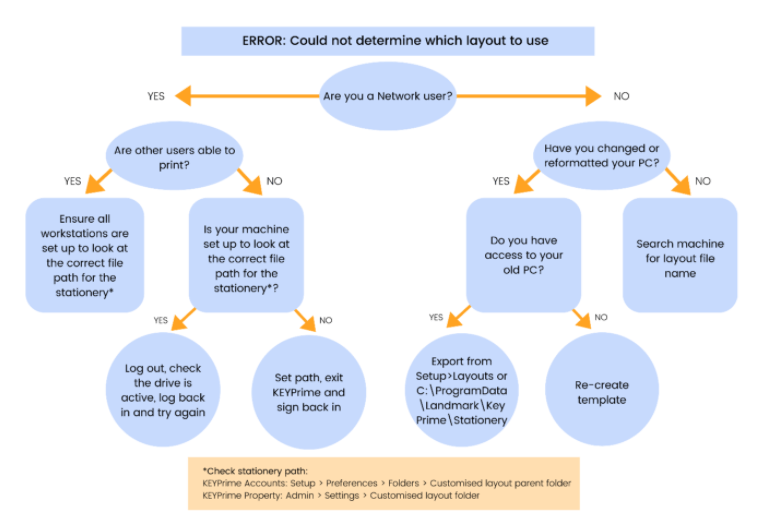
Getting an error, ‘Could not determine which layout to use’ when printing?
How do I include bank details on my invoices?
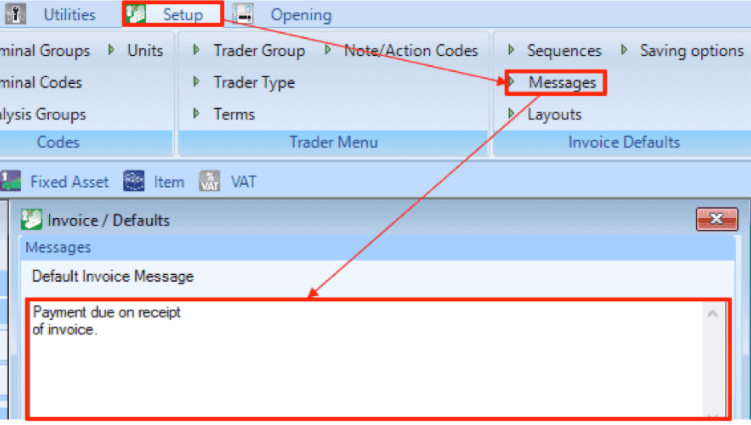
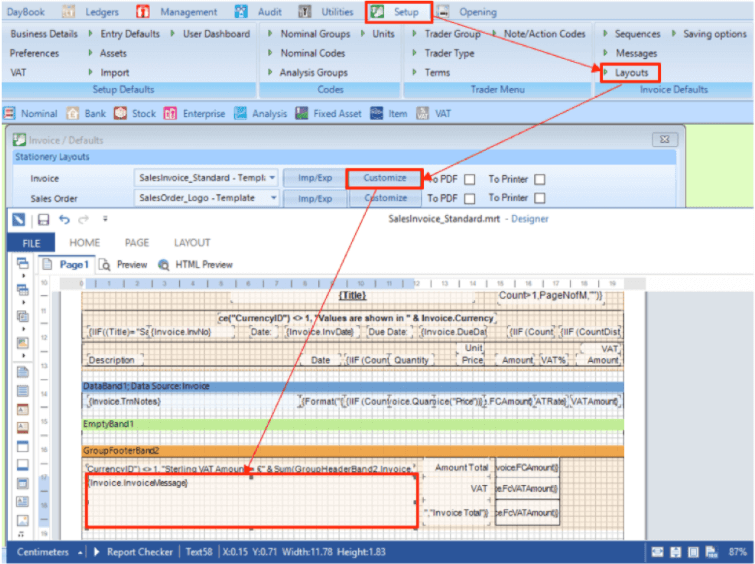
Alternatively, you can customise your template and hardcode the bank details. Go to Setup > Layouts > Customise the sales invoice and double click on the ‘Invoice.InvoiceMessage’, then select expression and enter your bank details.
How do I add a logo to my sales Invoice?
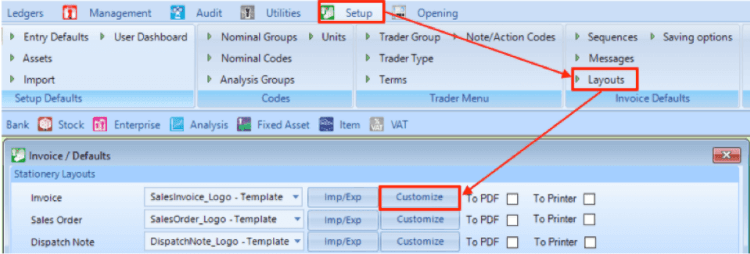
When you have loaded the template, double click on the KEYPrime logo and click ‘Open’. This will open a windows browser from where you can browse to and select your logo file by double clicking on the file or selecting it and clicking ‘Open’.
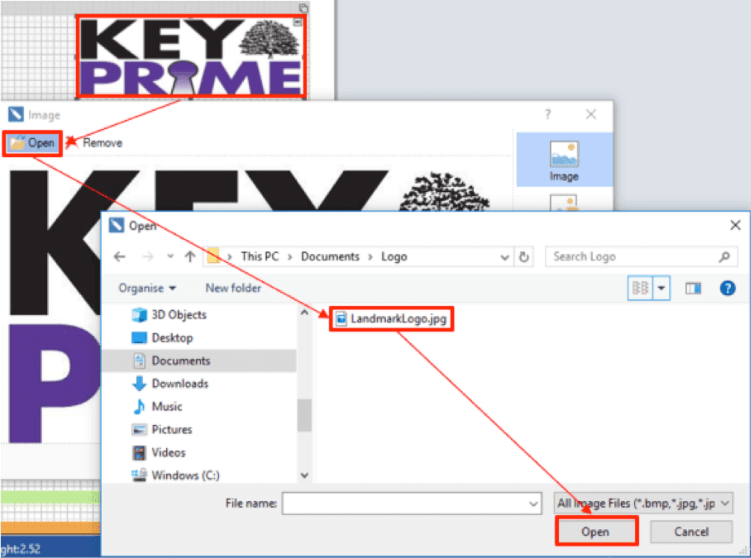
You can move the logo field around and change its size and once you are happy can save the template by clicking on the save button on the top left of the screen and give your template a name.
Can I change my stationery layouts?
When instructed by a member of the Landmark team, download these Microsoft Excel templates to speed up set up of your software:
Need help?


